I find that a lot of space taken up on clients’ hosting accounts is from emails, usually emails many years old.
One easy way to save much of the space is to archive the emails in offline folders after a period of time. You only need to do this for your main device if multiple devices use the same account.
The main email clients each have their own way to do this. Here is a step-by-step guide to each one:
Outlook 2013 – 2016
The various versions of Outlook have a similar archiving setup with an easy way to automatically move older emails from an online location to offline one.
- Firstly, create a new data file in Outlook 2013 or Outlook 2016. In the top menu go to: File | Account Settings button and then click on Account Settings.
- Click “Add” to create a new PST data file. Choose a name for the new data file; call it something like “Archive”. A folder will appear called “New Folder” in the mail folders list where you can create folders like “inbox” and “sent items” to store any emails you want to keep locally and offline.
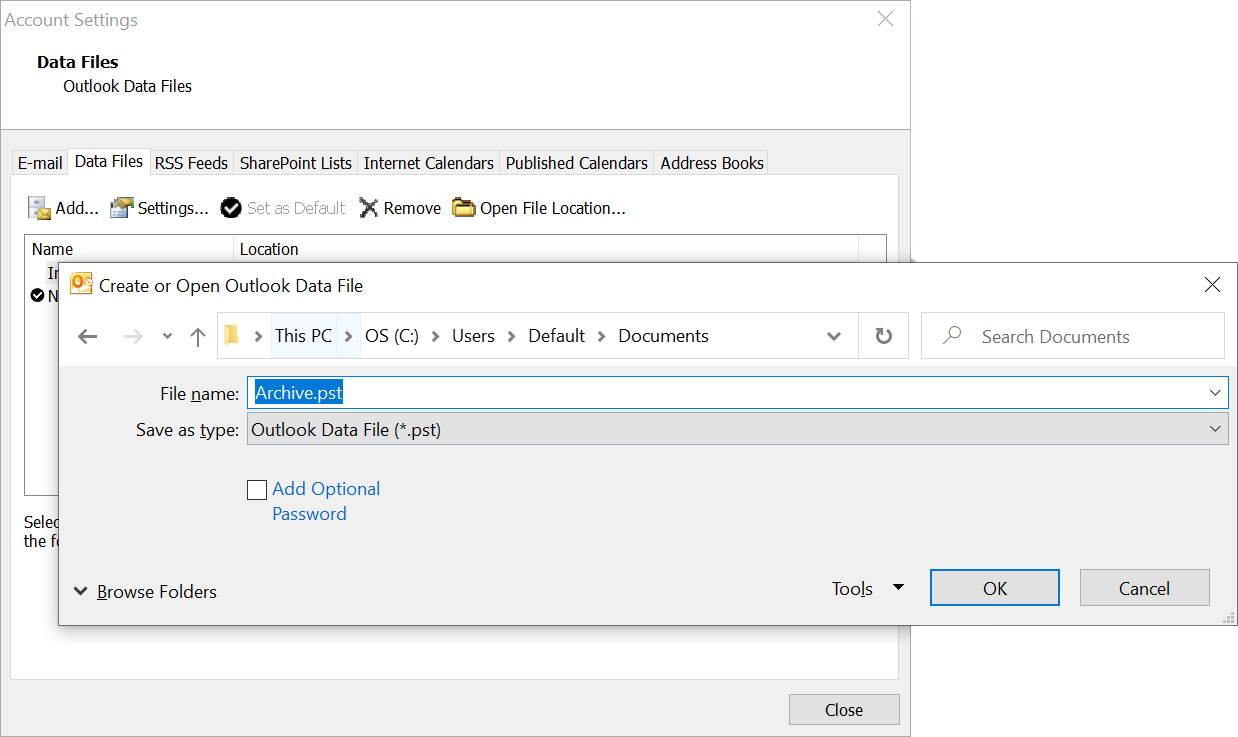
- Finally, you can now drag and drop emails you want to archive from you IMAP mailbox to your new local archive data file.
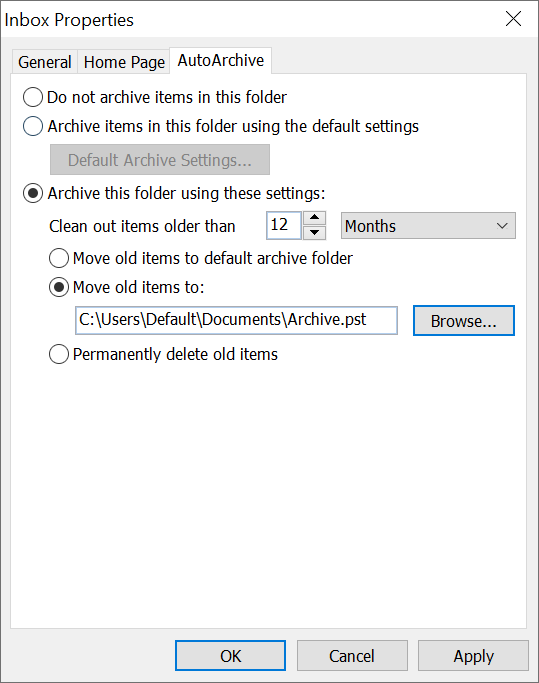
- I recommend using the auto-archive feature of Outlook to automatically move older mail items on a regular basis. Simply right click on your main Inbox folder, select Properties and click on the AutoArchive tab to setup the archiving process according to your preferences.
Outlook 2003 – 2007
- As with Outlook 2013 and Outlook 2016, create a new data file. In the top menu go to: Tools | Outlook Account Settings.
- Click “Add” to create a new PST data file. Choose a name for the new data file; call it something like “Archive”. A folder will appear called “New Folder” in your folders list, here you can create folders like “inbox” and “sent items” to store any emails you want to keep locally and offline.
- Finally, you can now drag and drop emails you want to archive from you IMAP mailbox to your new local archive data file.
- In your main inbox, I recommend using the auto-archive feature of Outlook to perform a clean-up of older emails. Right click on your main Inbox folder, select Properties and click on the AutoArchive tab to setup the archiving process according to your preferences.
Thunderbird
If Thunderbird account is configured with IMAP protocol, the user can archive the selected emails from Thunderbird mail folders to the local folders using the following steps:
- If you are using the IMAP email type (not POP) in Thunderbird, right click on Local Folder, and click on New Folder. You may wish to skip this step if you already have an Archive folder present.
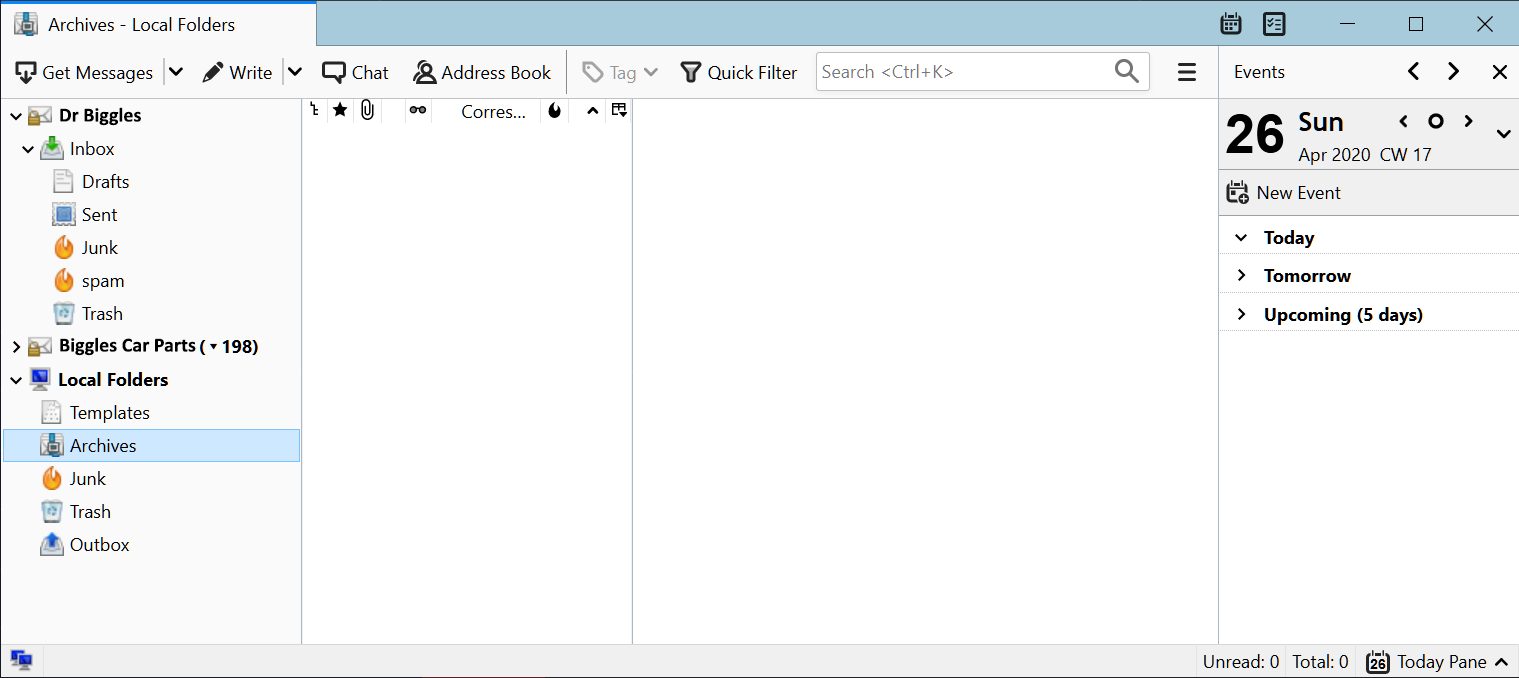
- Choose a name for the new archive folder (e.g. “Archive”) and click on Create Folder. The newly generated archive folder will appear in this section.
- Once you have created a new archive folder, right click on the email account you wish to archive and select Settings.
- Select “Copies & Folders”; under Message Archive select “Other” and choose the Archive folder that you wish to use in Local Folders.
- Select “Archive Options…” and choose the options there as you prefer and press “OK”.
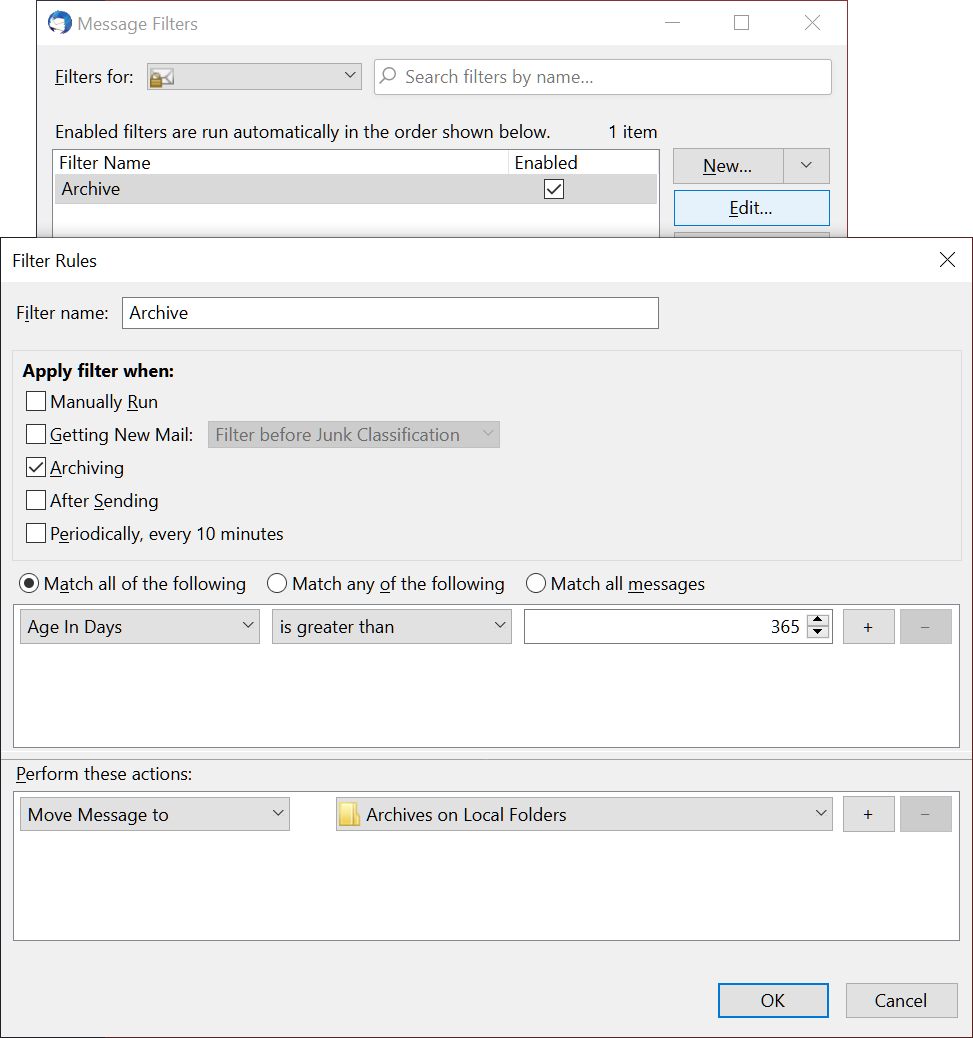
- In the top menu go to Tools | Message Filters to create a new filter that moves items when archiving takes places from your online folder to your offline archive. Call the filter a name like “Archive” and set the filter something like this…
If you don’t like the message filters, there are a few add-ons that will offer functionality to automatically archive only after a particular date.
Thunderbird is regularly updated and free for PC and Mac.
Mail for Windows 10
This program does not support offline archiving. If you prefer to continue using this program to collect, read and write emails using the IMAP system, you can install Thunderbird to manage the archiving process externally.
Mail for Mac
With Apple Mail/Mail for Mac, it’s similar story – the combination of an offline folder and a rule to move emails here after a period of time.
- In the Mail for Mac application, go to the top menu select Mail | Mailbox | New Mailbox…
- In the New Mailbox window, set the location to: “On My Mac” and enter a name such as “Archive”. Click OK. The new local and offline mail folder will appear in the list.
- Now go to Mail | Preferences, then click Rules.
- Click Add Rule; then type a name for the rule (e.g. “Archiving”).
- Specify the conditions such as the age of the email. If needed, set for all conditions to be true for the rule to be applied to a message.
- Choose the actions to perform on message, in this case move emails from an online folder to the offline and local archive folder.
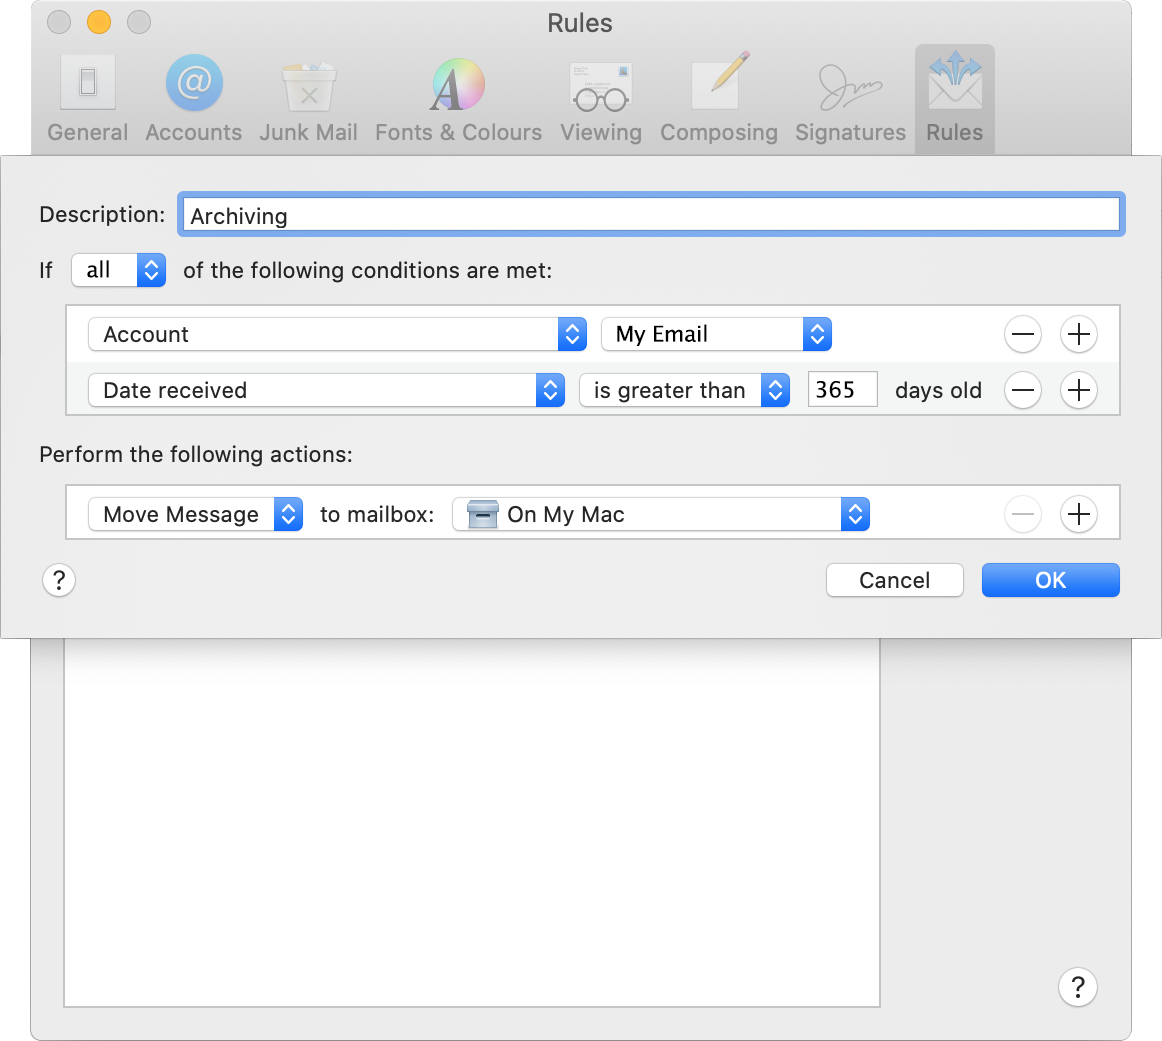
- When you’re done, click OK, then decide to apply rules to existing messages already in mailboxes or to new messages.
- You can apply rules to existing messages later by choosing Message | Apply Rules.
Gmail
This service does not support IMAP email. However, you can collect emails using POP and this will move emails from the web server to Google’s services, thus saving you space – when the option “Leave a copy of retrieved message on the server” is not selected. This is not recommended if you have more than one device as all messages will be moved into Gmail without any copies for other devices to collect.
Last updated on

